The Honeybadger Changelog

Here's what's cooking at Honeybadger.

Smart dashboards that adapt to your stack

Traditional APM tools bury you in dashboards you'll never use. Meanwhile, the things you actually care about—such as signups, payment failures, and that one background job that keeps timing out—require complex custom instrumentation. That's backwards.

We're making it easier to build custom dashboards that adapt to your workflow. Start with smart defaults for your stack, then customize everything to track what matters most to your product and business.

The Project Overview dashboard

We added an intelligent overview dashboard to every project that we configure automatically based on your stack. Are you using Rails? You'll see Rails-specific performance metrics, including slow controller actions, queries, and response codes. Running Phoenix? Get Ecto query performance and LiveView metrics. It's a great way to get a high-level view of your project, including errors, performance, uptime checks, and more.
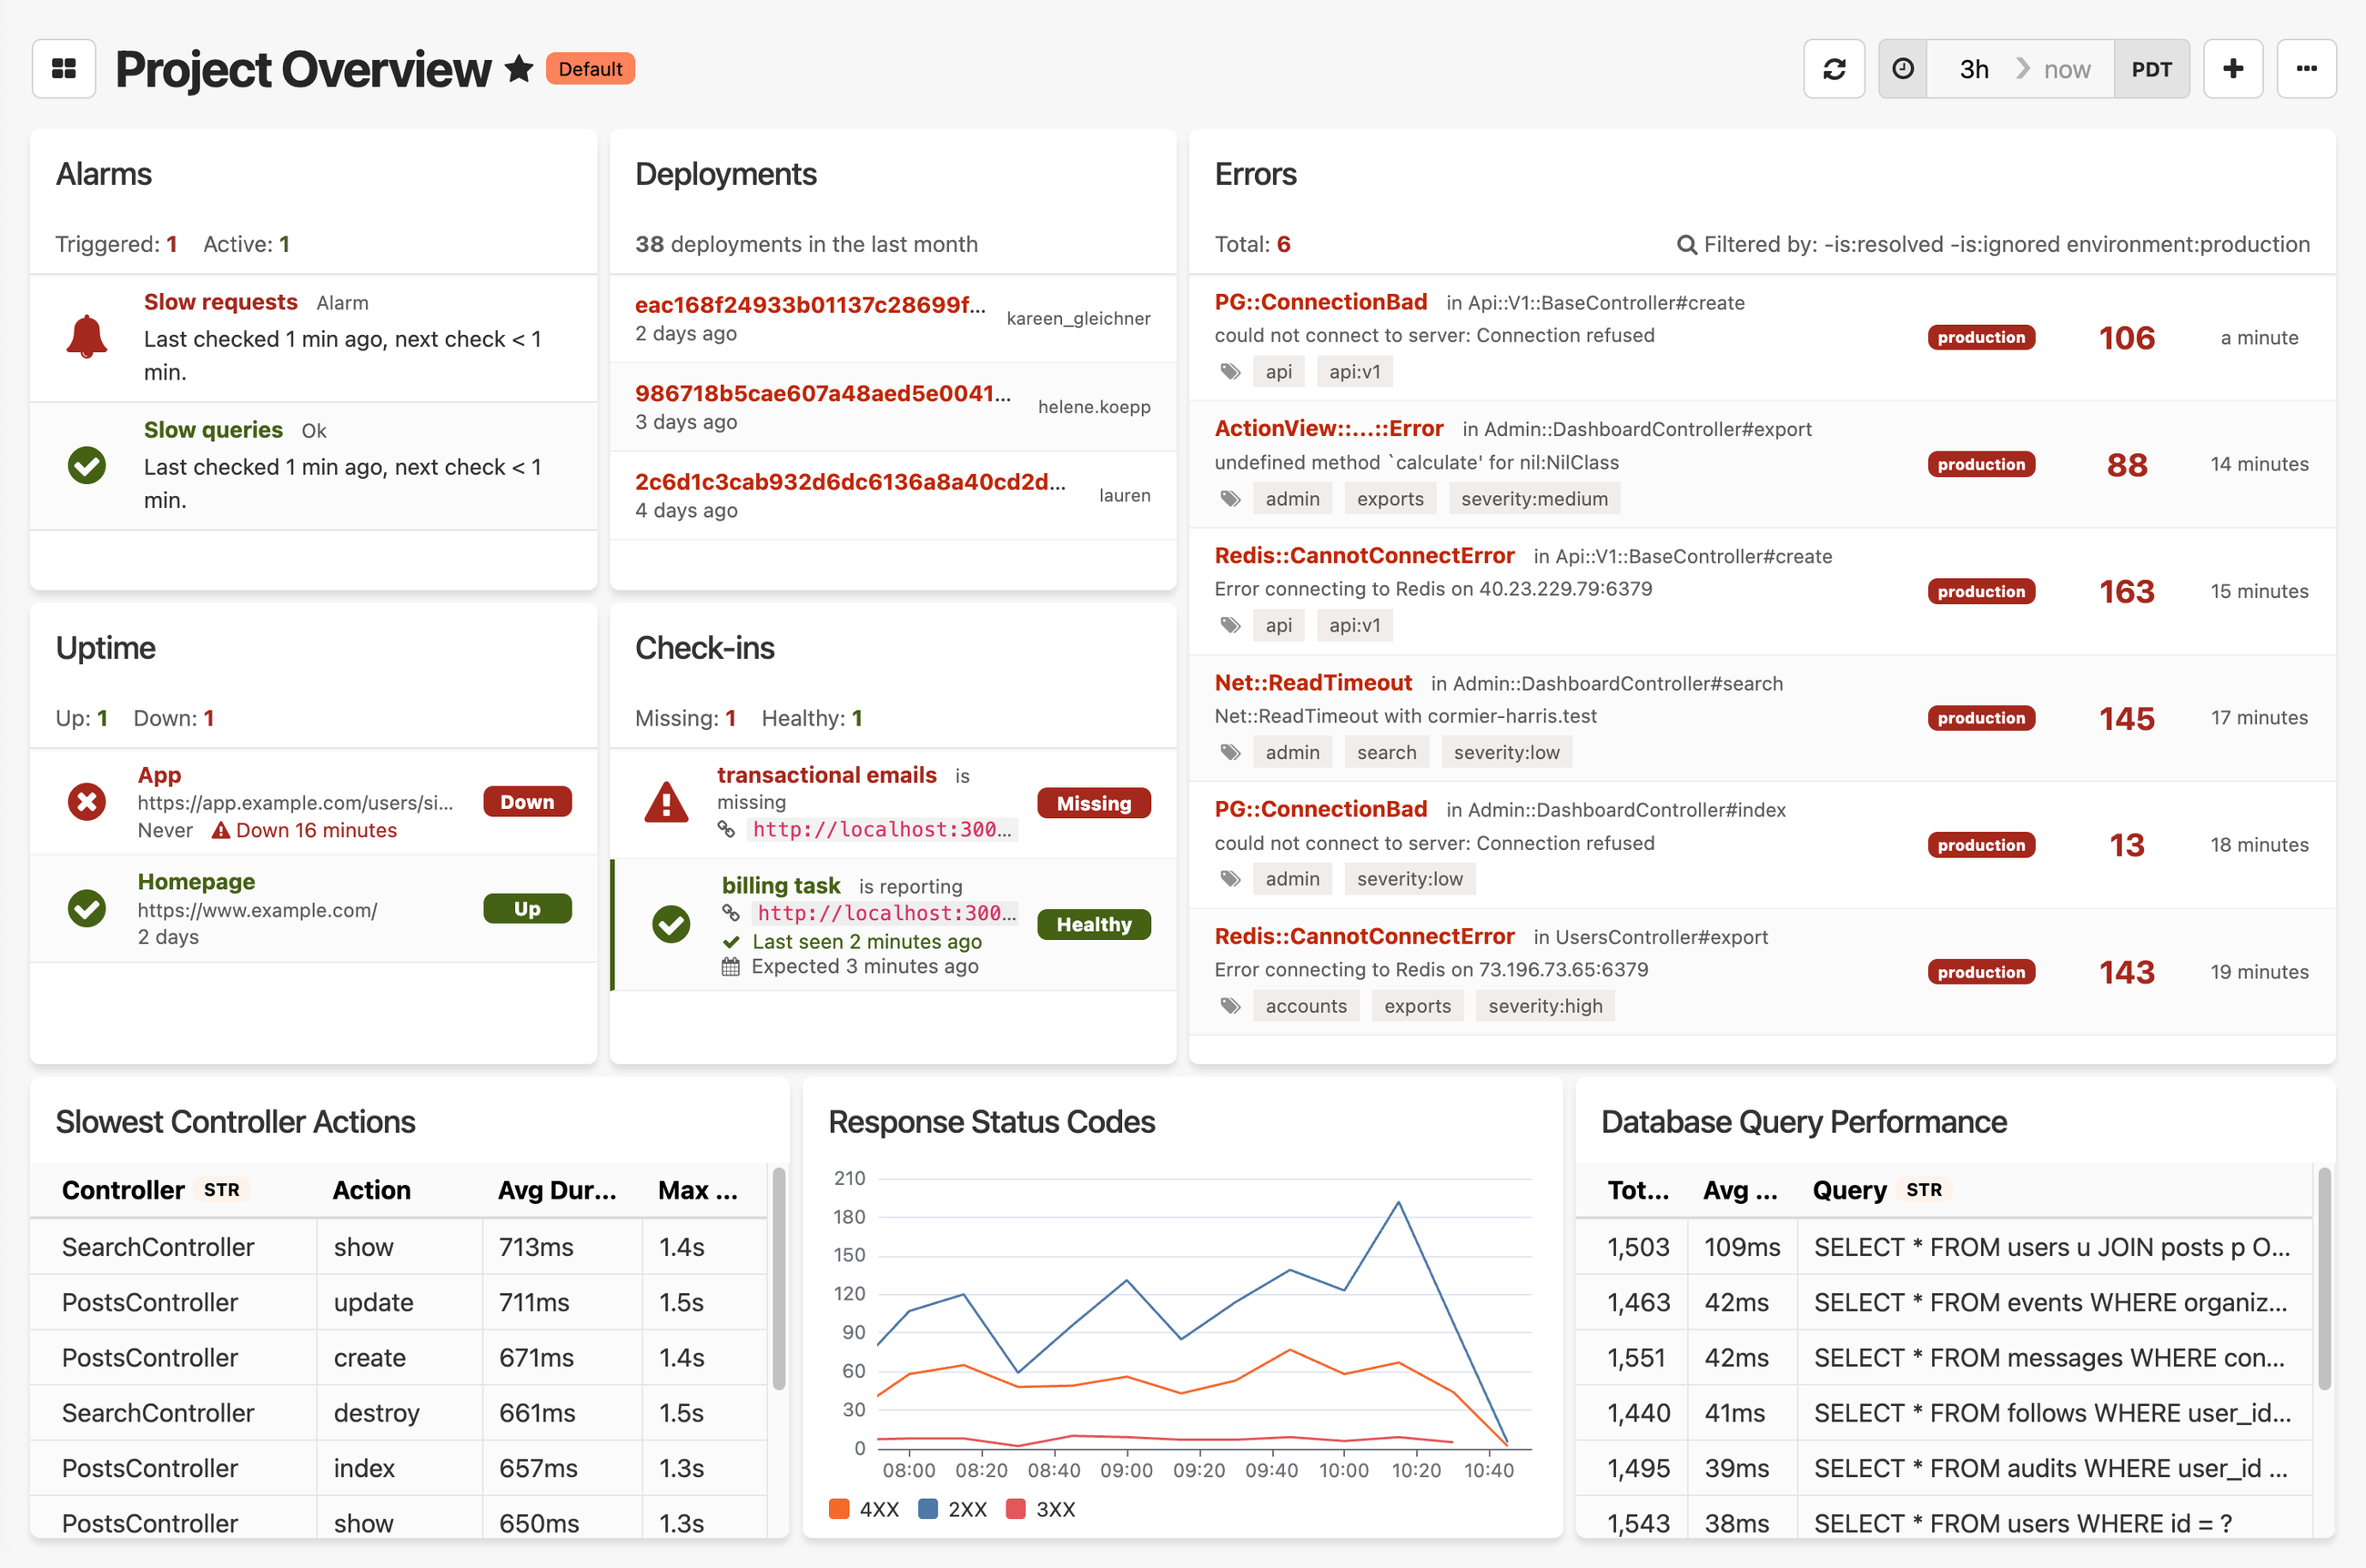
Project overview dashboard displaying multiple monitoring widgets including performance metrics, error rates, response times, and system status across different services. Honeybadger's new default Project Overview dashboard

To tie it all together, we added five new Honeybadger-specific widgets to give you quick access to:

  • Errors: List your latest error reports with configurable search filters
  • Uptime checks: See the status of your active uptime checks
  • Check-ins: See when your cron jobs and scheduled tasks last checked in
  • Deployments: List your latest app deployments
  • Alarms: See your custom alerts from Honeybadger Insights

These widgets appear on the default project overview dashboard by default, but they're also available in the new widget library to add to your other dashboards a la carte.

You can now quickly switch between your dashboards and discover new ones with a new dropdown menu that recommends automatic dashboards for your application. If you're using Sidekiq in Ruby or Oban in Elixir, for example, you can add those dashboards to your project with one click. We currently have automatic dashboards for popular tools and frameworks in Ruby, PHP, Elixir, and Python, with more on the way.
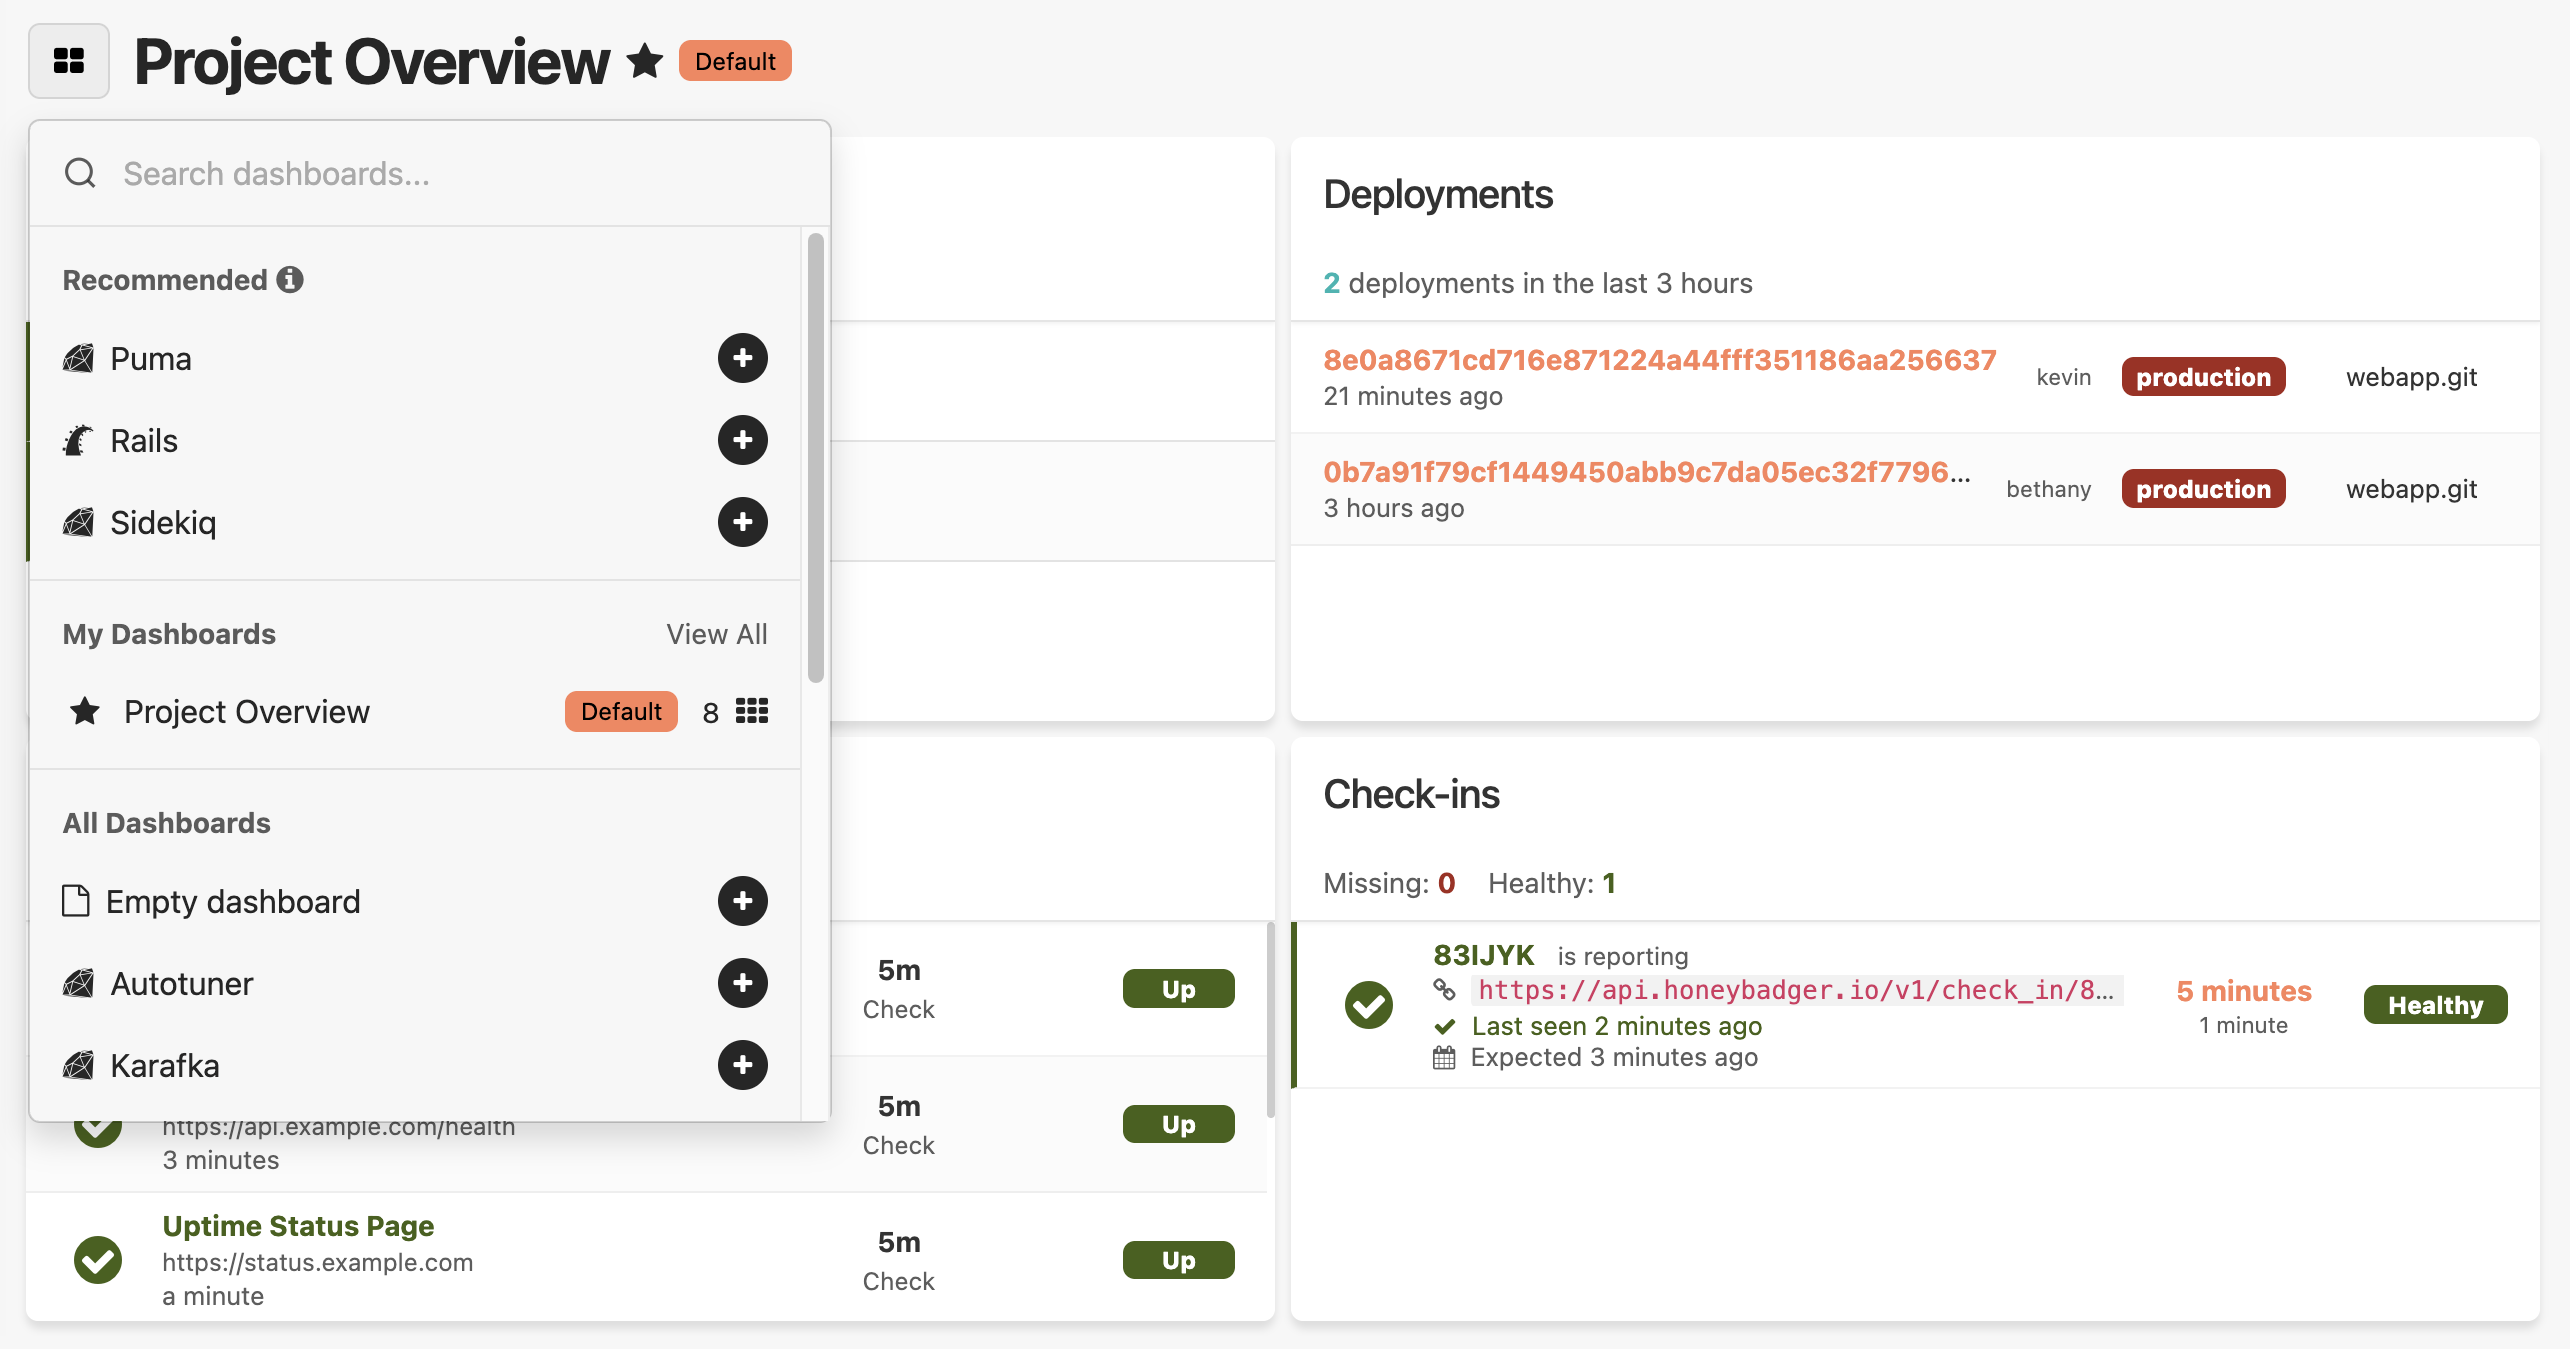
Dashboard selection interface showing a grid of automatically generated dashboards for different frameworks and services, with options to favorite, organize, and quickly switch between monitoring views. Recommended dashboards for a Rails project in Honeybadger

You can also now change your default project dashboard and star your favorite dashboards to pin them to the top of the list. We've been using these new dashboards internally to monitor Honeybadger, and it's been a big improvement to our daily workflow.

Create custom dashboards from the widget library

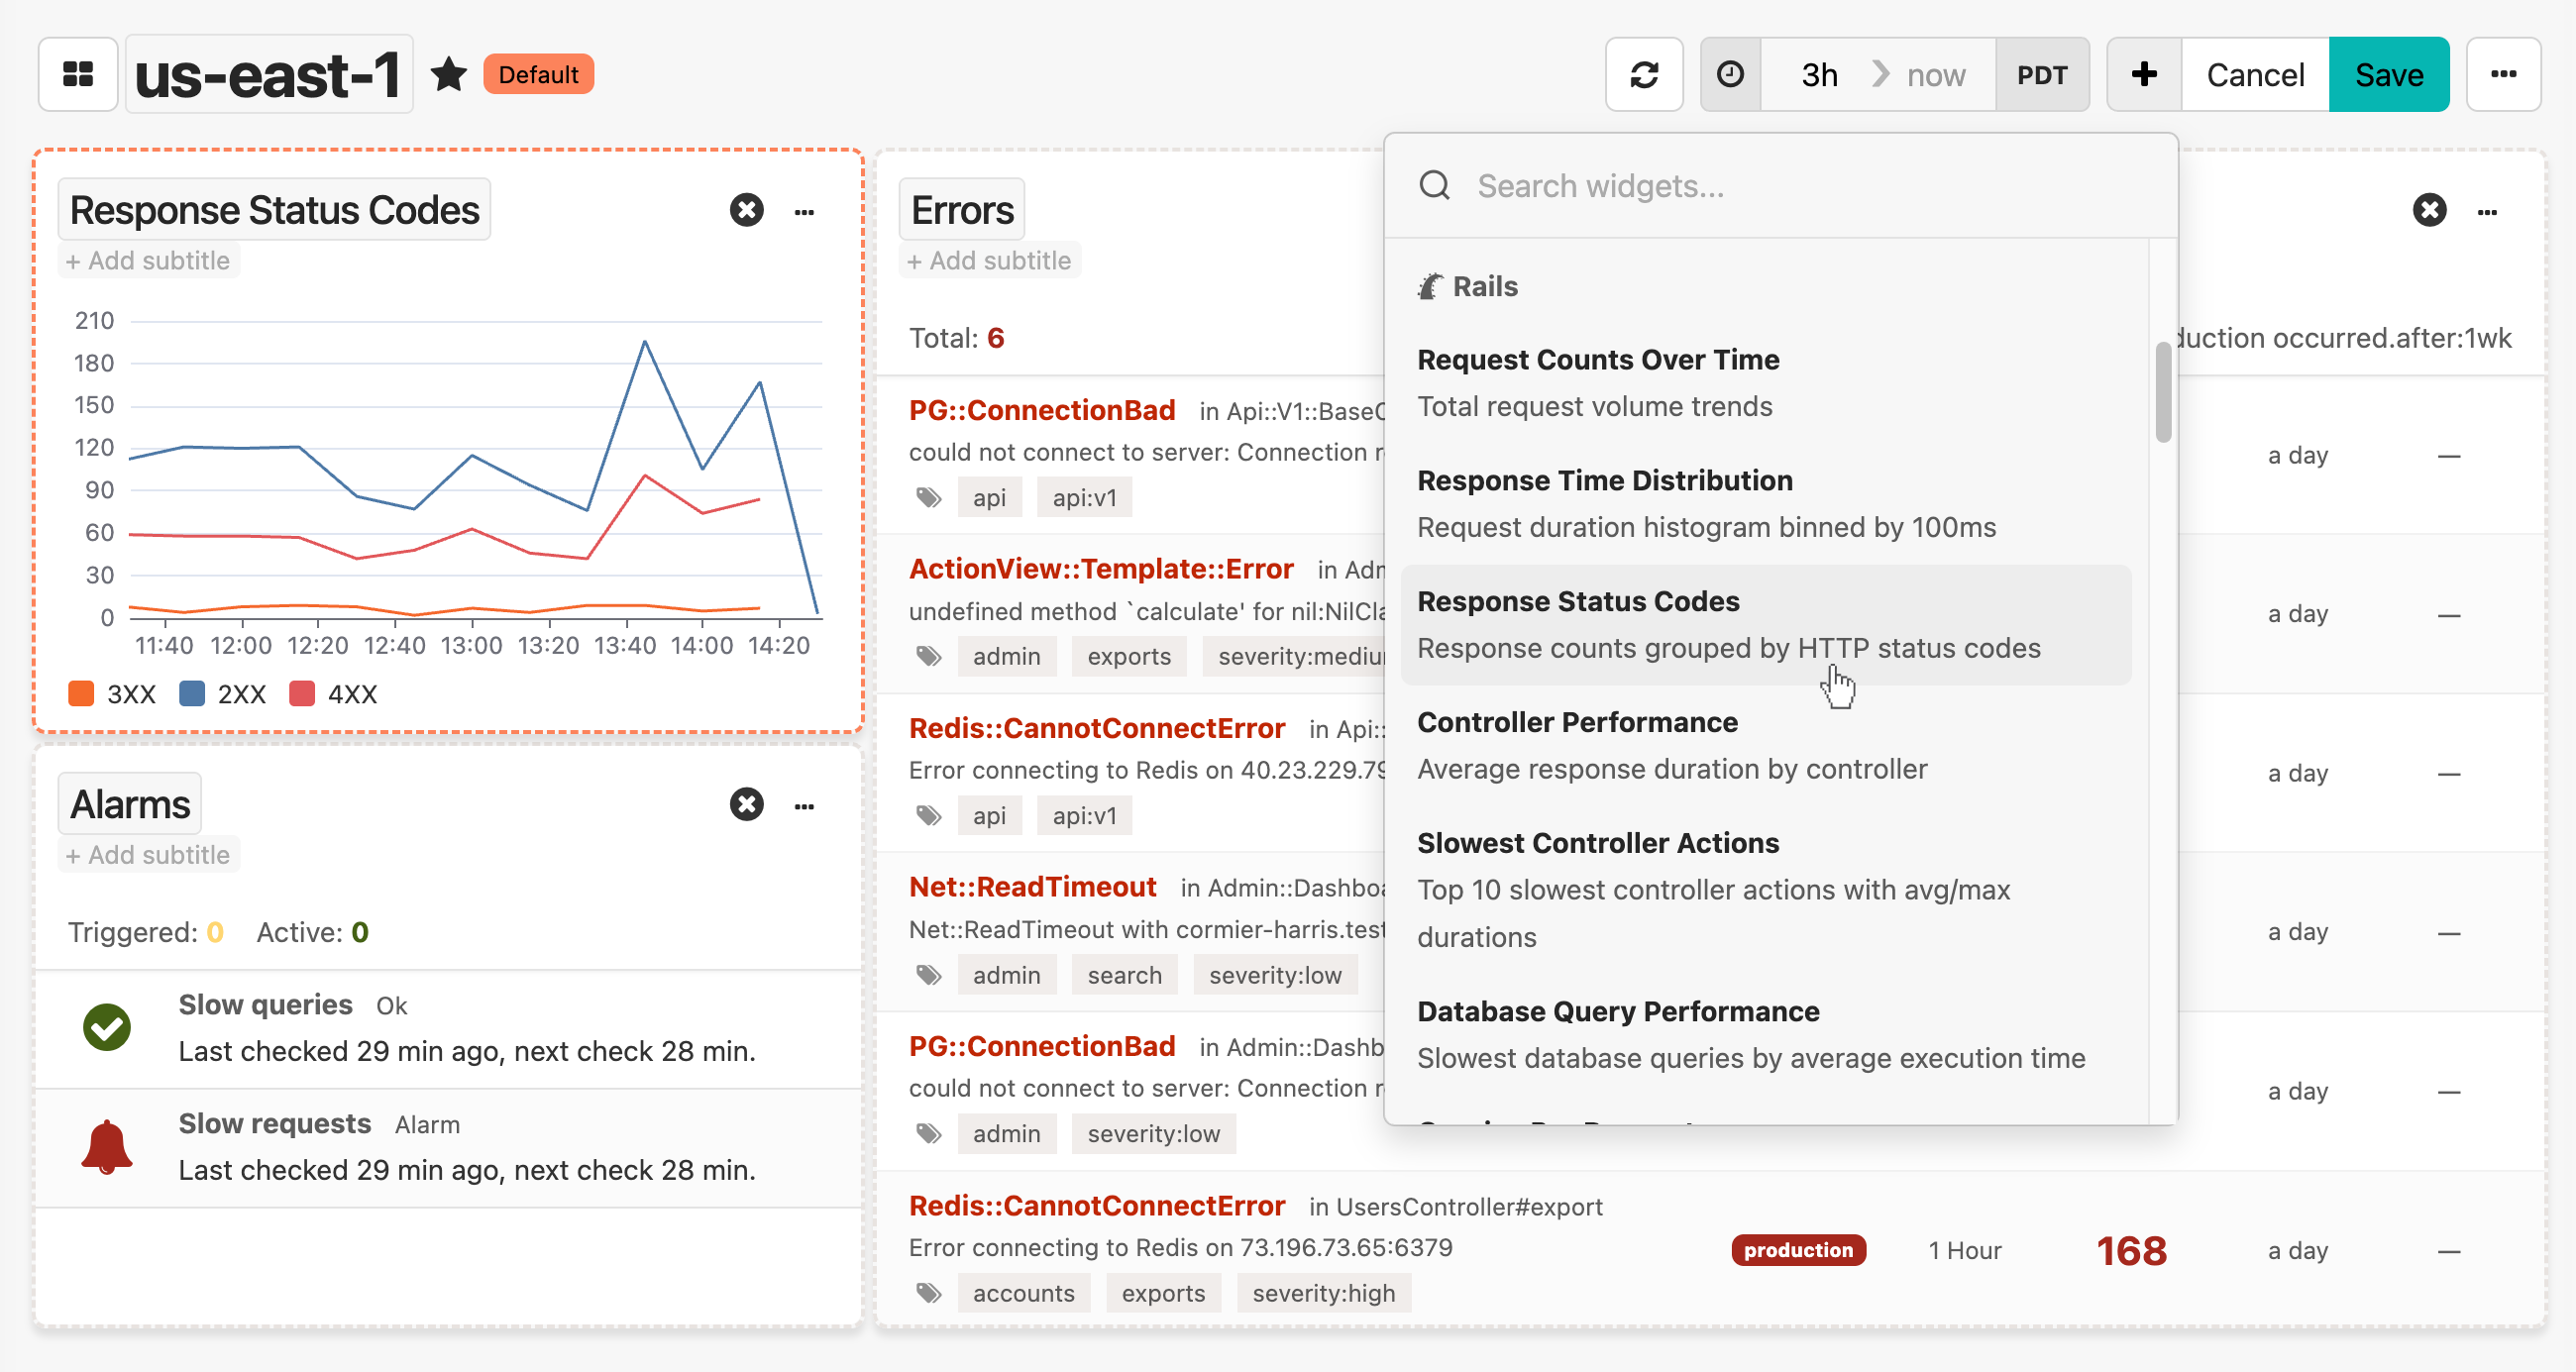
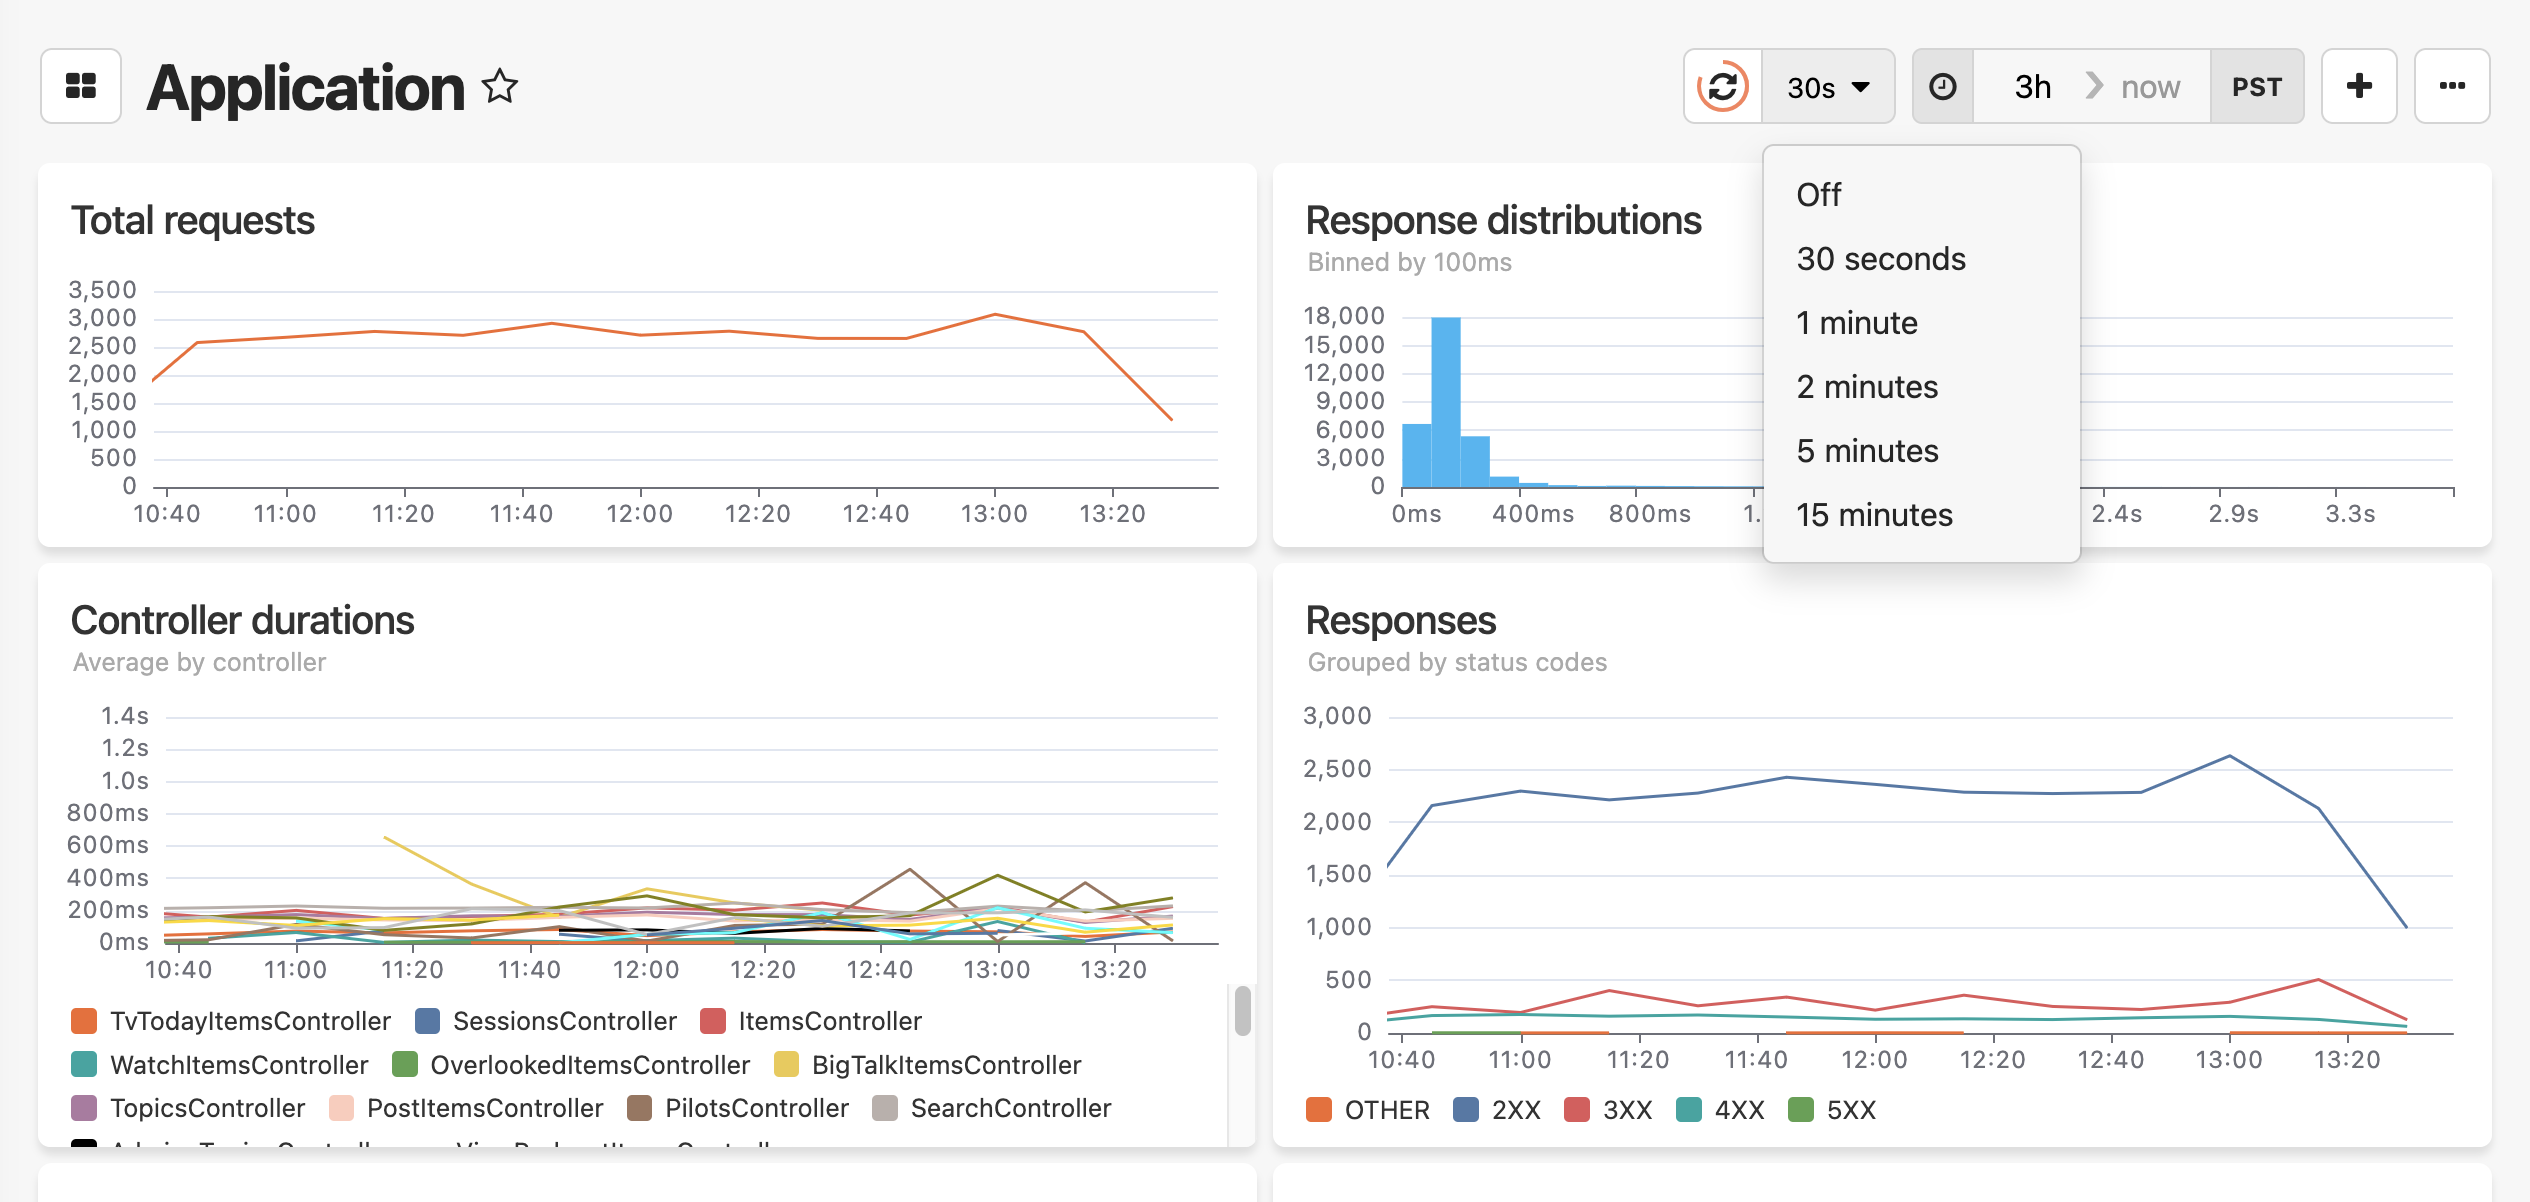
Need something more unique? We also made it easier to build your own dashboards. You can now create and edit widgets without leaving the dashboard you're working on. Click any widget to expand the inline query editor, make your changes, and see the results instantly.

Web application monitoring dashboard displaying a line graph of HTTP response status codes (2XX, 3XX, 4XX) over a 3-hour period, alongside a configuration panel showing filter settings and query parameters for the widget. Honeybadger's inline widget configuration and query editor

When creating new widgets, choose from a widget library of pre-configured templates for common data sources:

  • Error rates and deployments
  • Database performance metrics
  • Background job processing times
  • Request counts and response distributions
  • Cache hit rates and more

Widget library interface showing a variety of pre-built dashboard components including charts, metrics, tables, and monitoring widgets that can be drag-and-dropped to customize dashboards. Honeybadger's drag and drop widget library

We're particularly excited about this change because as we add new automatic dashboard templates, the widget library will grow. More to come!

Getting started with dashboards

The new project overview dashboard and UI enhancements are available immediately for all Honeybadger accounts. Head on over to your Honeybadger project and click on the "Dashboards" tab to get started. For details related to your application framework, see our announcements for Ruby, Laravel, Elixir, and Python.
Python performance monitoring for Django, Flask, and Celery

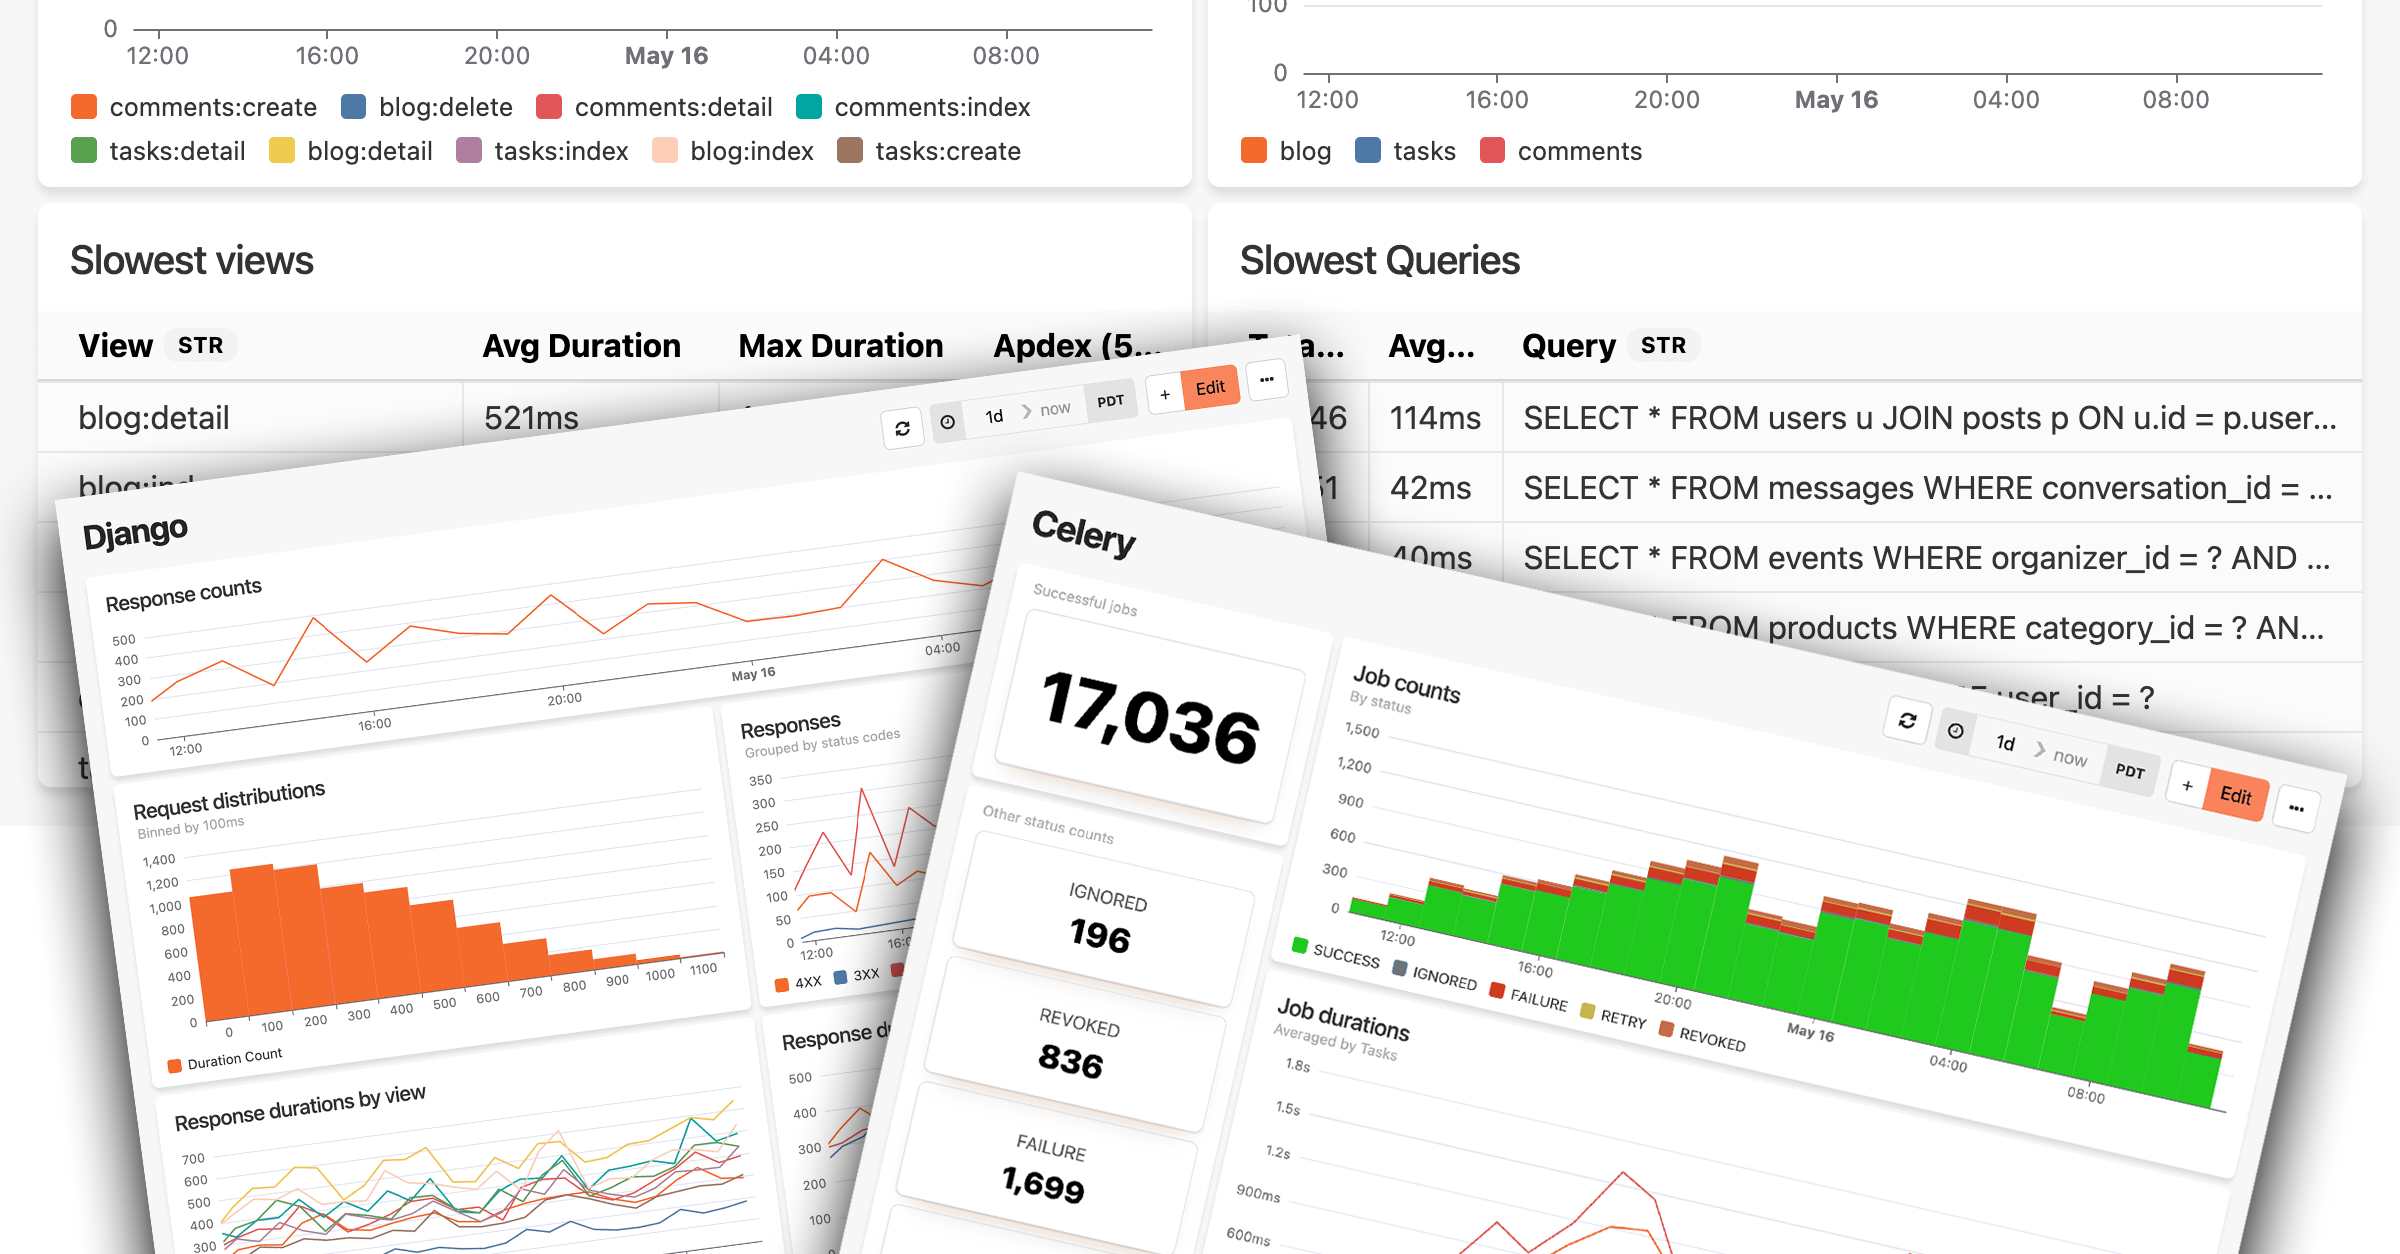
Honeybadger now offers automatic performance dashboards for Django, Flask, and Celery applications. Just like our Ruby, PHP, and Elixir dashboards, HB's Python performance dashboards provide instant visibility into your Python apps with zero-configuration instrumentation, plus direct access to transform, query, and alert on the underlying data.

A layered presentation of multiple Honeybadger performance monitoring dashboards showcasing the platform's comprehensive monitoring capabilities across different technologies. The image displays overlapping dashboard screenshots in a 3D perspective view, with Django and Celery monitoring interfaces prominently featured, showing response time charts, job execution metrics, and performance analysis tables. In the background, partial views of additional dashboard widgets are visible, including slowest views and database query performance tables, demonstrating how developers can create multiple specialized dashboards to monitor different aspects of their application stack. This composite view illustrates Honeybadger's ability to provide tailored monitoring solutions for various frameworks and services within a single platform.

Our Python performance monitoring builds on Honeybadger Insights to automatically capture telemetry from your applications, then presents it through curated dashboards that highlight performance trends and bottlenecks.

What's new

  • Django performance dashboard: Track request performance, identify slow views, monitor Django ORM queries, and analyze response distributions—all automatically instrumented from your Django applications.
  • Flask performance dashboard: Monitor routes and blueprints, track SQLAlchemy query performance, and get detailed insights into endpoint response times.
  • Celery performance dashboard: Visualize background job health, track task execution times, identify slow workers, and monitor job success rates across your Celery queues.
  • Zero-config instrumentation: Once you install Honeybadger in your app, the Python package automatically captures telemetry from Django, Flask, FastAPI, and Celery.

How it works

Honeybadger automatically instruments popular Python frameworks to capture detailed performance events, including HTTP requests, database queries, and background job metrics. This telemetry feeds directly into your dashboards, but you also query and analyze the raw data using BadgerQL—and even create alerts for specific events and metrics.

Getting started

If you already use Honeybadger, all you need to do is upgrade your Honeybadger Python package and enable Insights in your config. For new setup instructions, see our integration guides for Django, Flask, and other Python frameworks.

Python performance monitoring is now available for all Honeybadger accounts, with flexible usage-based pricing options. Check out the announcement blog post to learn more and see the dashboards in action.

Customizable timeouts for uptime checks

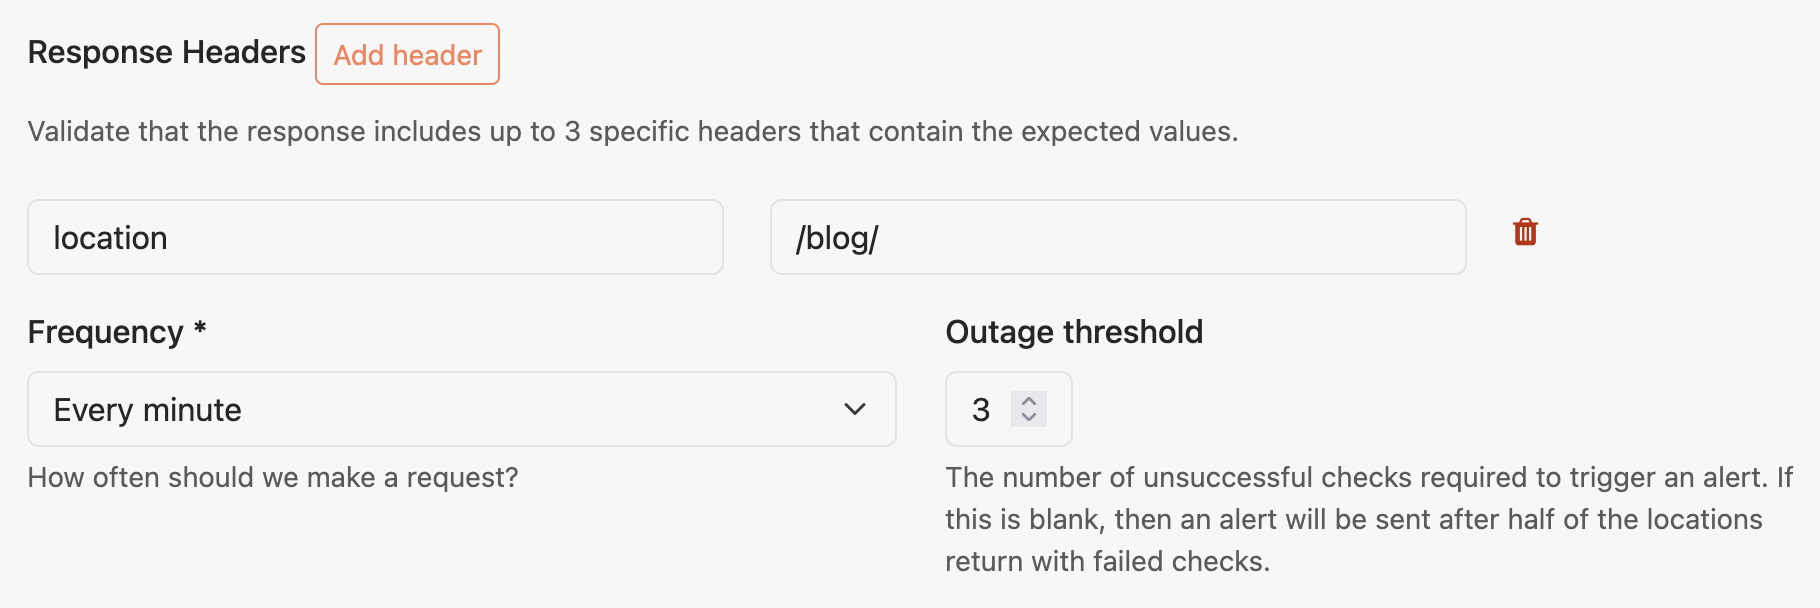
We're excited to announce a new timeout configuration option for uptime checks! This feature gives you more control over how long your uptime checks wait for responses from your endpoints.

With a custom timeout value for each uptime check, you can:

  • Increase the timeout (up to 120 seconds) for endpoints that naturally take longer to respond (e.g., database-heavy operations)
  • Decrease the timeout (down to 1 second) to enforce strict SLA requirements (e.g., ensuring responses within 5 seconds)

When an uptime check exceeds your configured timeout, it will be marked as failed, helping you identify performance issues that don't meet your requirements.

This feature is available now on Business and Enterprise tiers. Other tiers will continue to use the default timeout of 30 seconds.

To configure timeout settings for your uptime checks:

  1. Navigate to your uptime check settings
  2. Look for the new "Timeout" field
  3. Set your desired timeout value (in seconds)
  4. Save your changes

The timeout configuration will take effect immediately for new check runs.

Earn free monitoring credits with our new customer referral program

Your clients and coworkers are already asking about Honeybadger when they see how smoothly your apps run. Now when they sign up, you can earn credits towards your own account.

Our new customer referral program gives you up to 20% of referred revenue as credit towards your bill. Refer a company paying $200/month and earn up to $40/month in credits—enough to cover a full $26/month team account with room to grow.

When you join:

  • Share your unique referral link with colleagues and coworkers
  • Earn up to 20% of referred payments as monthly/annual invoice credits
  • Reduce your bill to $0 with enough referrals

Monthly credits apply as long as both accounts remain active; one workplace referral could cover you indefinitely. Note: Credits don't roll over, so use them each month or lose them.

Getting started

  1. Visit Settings & billing → Referrals in your Honeybadger account
  2. Accept the terms to join the program
  3. Share your unique referral link with colleagues and clients
  4. Earn automatic credits on your next bill when they become paying customers

Available immediately for all Honeybadger accounts. Read the full announcement to learn more.

Automatic Sidekiq monitoring dashboard

When Sidekiq jobs pile up, you need fast answers. Honeybadger Insights already makes it easy to query your Rails performance data, including Sidekiq performance. But it can be hard to know where to start—until now. We just added a new Sidekiq dashboard to Honeybadger.

Screenshot of a Sidekiq dashboard showing background job monitoring metrics including 136,810 successful jobs and 13,526 failures. The interface displays job counts over time for different worker classes (UnbarableJob, SpamUserJob, SendEmailJob, etc.), job durations averaging around 1.2 seconds, and duration distribution charts, providing comprehensive insights into background job performance and system health. Honeybadger's Sidekiq monitoring dashboard

The Sidekiq dashboard gives you immediate visibility into your background job performance without any custom configuration, and the charts are a great starting point when investigating slowdowns and other issues. The dashboard automatically captures and visualizes your Sidekiq job performance, including:

  • Job volume: Monitor job counts over time by worker class
  • Performance trends: Visualize performance patterns with job durations and distributions
  • Success/failure metrics: View comprehensive worker statistics with totals and averages
  • Bottlenecks: Spot the 10 slowest job runs with execution details

Monitoring Sidekiq performance in Honeybadger

Honeybadger automatically instruments your Sidekiq jobs when you enable Insights in the Honeybadger Ruby gem. To get started, update to gem version >= 5.11 and enable Insights in your config/honeybadger.yml:

insights:
  enabled: true

Once enabled, select "Sidekiq" from the Ruby automatic dashboard templates in your Honeybadger project.

The new Sidekiq dashboard is available immediately for all Honeybadger accounts. Check out our Ruby gem docs for more details on HB's automatic Rails instrumentation.

Connect your AI code assistant directly to Honeybadger

Debugging errors is faster when your AI assistant has full context about what's happening in your application. We just released honeybadger-mcp-server, a new Model Context Protocol (MCP) server that provides AI tools—such as Claude, Cursor, and Copilot—with direct access to your Honeybadger error data and project information.

Screenshot of Cursor code editor using a Claude AI model to help fix a Honeybadger error. The left side shows Ruby code for a GoogleHangoutsChat class, while the right side displays Claude actively investigating a Honeybadger EU error by calling API functions like 'get_fault' and 'list_fault_notices'. Claude is analyzing error details and providing real-time debugging feedback within the Cursor development environment. Automatically fixing a Honeybadger error in Cursor

The MCP server automatically connects your development environment to Honeybadger's API, enabling your AI assistant to manage your Honeybadger projects, retrieve detailed error information and affected user data, access occurrence counts and project reports, and query specific errors with their full context for real-time debugging.

How it works

The MCP server acts as a bridge between Honeybadger's API and MCP-compatible AI tools. Instead of manually copying error details or switching between tools, your AI assistant can directly fetch relevant error information, analyze patterns, and provide contextual debugging suggestions—all within your existing workflow.

Getting started

  1. Pull the Docker image:

    docker pull ghcr.io/honeybadger-io/honeybadger-mcp-server:latest
    
  2. Get your personal auth token from your Honeybadger User settings under the "Authentication" tab

  3. Configure your dev environment to run the MCP server (supports Claude Desktop, Cursor, Windsurf, VS Code, Zed, and more)

  4. Start debugging faster with your Honeybadger-aware code assistant

Beta release and roadmap

This is a beta release focused on error tracking and project management—but even with those two features, honeybadger-mcp-server is surprisingly capable. We're actively developing additional tools for working with Honeybadger Insights data, account and team management, uptime monitoring, and other platform features. More to come!

Check out the honeybadger-mcp-server docs for detailed setup instructions for your specific development environment.

AI-ready backtraces in Slack error notifications

When errors happen, your AI coding assistant can only help if it has the context it needs. To give you a hand, Honeybadger now includes full backtraces in Slack error notifications.

The backtrace appears as formatted code in Slack, making it easy to copy/paste or forward to your favorite AI debugging assistant like Cursor, Windsurf, or Copilot. Or, if you use Cursor's Background Agents, you can install their Slack integration to ask Cursor to fix the error without leaving Slack!

Screenshot of a Honeybadger error notification in Slack at 12:24 showing a NoMethodError for an undefined 'charge' method in the Monolith project's production environment. The error occurred on line 103 of the order.rb file in the charge_payment method. Below the error details is a chat interface where someone is asking '@Cursor fix this error' with an option to 'Also send to # alerts', demonstrating how developers can quickly escalate Honeybadger errors for AI-assisted debugging and team notification.

If you already have a Slack integration in Honeybadger, this feature is enabled automatically. Check out our Slack integration docs for more info, and our Working with LLMs guide for best practices and to super charge your AI-development workflow with Honeybadger's Model Context Protocol (MCP) server.

Automate Rootly incidents from Honeybadger alerts

Coordinating your incident response across multiple tools during a system outage can waste precious time. To help you move faster, we've integrated Honeybadger with Rootly. Rootly is an incident management platform that automates response workflows directly in Slack and other team communication tools.

Our integration automatically creates alerts in Rootly based on events from across your Honeybadger monitoring stack:

  • Error Tracking: New errors and error rate spikes
  • Uptime Monitoring: Site outages, recoveries, and SSL expiration warnings
  • Cron & Heartbeat Monitoring: Failed or missing scheduled jobs
  • Insights AlarmsCustom alerts from Honeybadger Insights

Screenshot of a Honeybadger error notification integrated within Rootly's incident management platform. The alert shows '#bkkQ9b [Ben's Shared Project/test] TestingException: This is a test error generated by Honeybadger' with status indicators including a green 'Resolved' badge, 'High' priority, timestamp showing '7 days ago', duration of '00:02:39', and 'Not noise' classification. On the right side are action buttons for 'View Details', 'Create incident', and additional options. The notification displays Honeybadger's logo alongside Rootly's interface elements. A Honeybadger alert in Rootly

From there, use Rootly's automated alert workflows to create and manage incidents with Honeybadger's rich diagnostic data.

How it works

Honeybadger sends events to Rootly via secure webhooks, automatically creating alerts with direct links back to Honeybadger for deeper investigation. We include detailed contextual data with each event that you can use to customize Rootly's alert workflows for your specific needs—whether that's automatically creating incidents for critical errors, routing alerts to particular teams, or triggering custom automations based on the type of issue detected.

When Rootly receives an alert from Honeybadger, you can manually declare an incident or configure Rootly's alert workflows to create incidents based on specific criteria automatically. Once an incident is created, Rootly takes over the orchestration—spinning up dedicated Slack channels, looping in the right responders, creating Zoom rooms, and providing step-by-step guidance for incident response.

Sending Honeybadger alerts to Rootly

Here's how to configure the integration:

  1. Navigate to your project's Settings → Alerts & Integrations page
  2. Select Rootly under "Add a project integration"
  3. In Rootly, create a Generic Webhook alert source named "Honeybadger" and copy the authorization token
  4. Paste the webhook token into Honeybadger's integration settings
  5. Optionally specify a target type and target ID for routing alerts
  6. Save and test the integration to send a sample event to Rootly

As a final step, you'll need to configure the Alert Content settings for your Rootly webhook alert source using these template variables:

  • Alert Title: {{ alert.data.title }}
  • Alert Description: {{ alert.data.description }}
  • Link to Alert: {{ alert.data.url }}

Honeybadger's Rootly integration is available for all Honeybadger accounts. Check out our Rootly integration docs for detailed setup instructions.

.NET and C# error tracking

Building robust .NET applications means knowing when your users encounter errors in production, but traditional logging often misses critical exceptions or lacks the context needed for quick debugging. We've brought Honeybadger's powerful error tracking to the .NET ecosystem, giving your .NET and C# applications the monitoring they deserve.

The Honeybadger .NET package uses middleware to automatically capture unhandled exceptions with full stack traces and environment information. Key features include:

  • Flexible configuration through code or appsettings.json
  • Custom context and metadata for tracking user sessions, feature flags, and more
  • Breadcrumb trails to trace events leading to errors
  • Seamless dependency injection support
  • Optional logging provider for .NET's built-in framework

The integration respects environment settings, skipping error reporting in development unless explicitly configured.

Setup takes just a few minutes: install the NuGet package, register Honeybadger in your application with your API key, and you're done. Honeybadger will begin to report production exceptions as soon as you deploy your application. Honeybadger supports all modern .NET Core applications.

Check out the Honeybadger for .NET docs for detailed setup instructions and advanced usage examples.

Elixir performance monitoring for Phoenix, Oban, and more

Introducing Elixir performance monitoring in Honeybadger!

A composite view of Oban, Phoenix, and Elixir application performance monitoring dashboards showing multiple monitoring interfaces layered together. The top portion displays a line graph tracking several metrics over time on March 28, with blue and red lines showing activity patterns throughout the day. Below are two performance analysis tables titled "10 Slowest Controller Actions" and "10 Slowest Ecto Queries" containing database query performance data. In the foreground are two overlapping dashboard cards: on the left, a "Phoenix" monitoring panel showing 9,913 requests with accompanying line graphs, and on the right, the "Oban" background job monitoring panel displaying 82,426 successful jobs and additional status counts (839 discarded, 798 snoozed, 8,273 failures). Both panels include time controls for "1d" and "3d" views in PDT timezone with edit buttons, presenting a comprehensive view of web application and background job performance metrics.

We've added three new features to Honeybadger Insights:

  1. A new Phoenix performance dashboard. Instead of creating a dashboard from scratch, select " Phoenix" from our list of automatic monitoring dashboards. The new dashboard allows you to monitor requests, slow controllers, Ecto queries, and more.
  2. A new Oban dashboard. We love Oban at Honeybadger and thought it would be the perfect companion to the Phoenix dashboard (the first of many useful dashboards, we hope!). The Oban dashboard gives you a quick overview of your Oban performance, including job counts by status, worker stats, and slow jobs.
  3. Elixir & Phoenix performance instrumentation. Our Hex package now automatically sends performance events and metrics (via telemetry) from Phoenix and other popular libraries. The new instrumentation powers your dashboard, but you can also use our query language (BadgerQL) to dig into the data yourself, which creates some exciting possibilities.

To use these features, you'll need to upgrade to version ~> 0.24 of the the honeybadger Hex package and enable a config option in your config.exs:

config :honeybadger,
  insights_enabled: true

Honeybadger automatically instruments the following libraries when they are available:

  • Ecto: Database queries
  • Plug/Phoenix: HTTP requests
  • LiveView: Phoenix LiveView lifecycle events
  • Oban: Background job processing
  • Absinthe: GraphQL query execution
  • Finch: HTTP client requests, often used by other libraries like Req
  • Tesla: HTTP client requests

You can also customize the default dashboards and send custom logs and events to Honeybadger — read the full blog post to learn more.